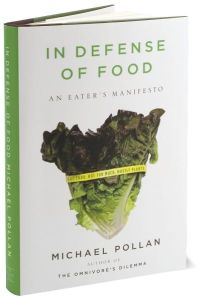
In Defense of Food

bookcoverMy book club chose this book last month for something different, and I really enjoyed reading it! I had it sitting on my shelf for a long time and was glad for some motivation to actually pick it up and get through it, and I’m glad I did. It is a great book that takes a look at the way most of us view food and critiques some of the negative aspects of the Western diet. As a guide, Pollan uses the following rule of thumb: “Eat food. Not too much. Mostly plants.” He sheds light on a lot of the problems with the way we eat in America, a country lacking in food culture where family meals around the dinner table are becoming few and far between.

It is interesting to think about the difference in the actual foods we eat and the nutrients in them. He points out that we often reduce the foods to the positive nutrients we are told that we need, and yet we miss the combination of elements that make up those actual foods. Milk is an easy example…we are told we need milk, but many people reduce that to a calcium supplement or try to get the protein elsewhere…but maybe it’s the combination of the protein, calcium and lactose that make up the milk that benefits the body. When we reduce it to the nutrients then we start allowing things into our diet that are manufactured to look and taste like food but are actually chemically created substances…i.e. “whole grain” Lucky Charms or “double fiber” breakfast bars. Are these things really food our body was designed to eat and break down? and do we get the same benefits?

It is a lot to think about…but it can help break down some of what you encounter in the grocery store (he asks, ‘would your great grandmother know what this is? if not, don’t buy it’) and give you a fresh way of viewing those lists of ingredients on the back of the box (he recommends not buying things with more than five ingredients, or ingredients you cannot pronounce). It is a very practical book and will help you see the FDA, cooking and even organic shopping in a whole new light!

Leave a comment

Filed under book reviews

It’s pumpkin season!

One of my favorite flavors of fall is pumpkin! I love how around October you start seeing pumpkin everything – even recently I saw that jamba juice has a pumpkin smoothie and all the yogurt places here have pumpkin yogurt. I don’t know if I would take it quite that far, but I do love baked pumpkin goods. I wanted to share two good ones with you – one homemade, and one made by Trader Joe’s!

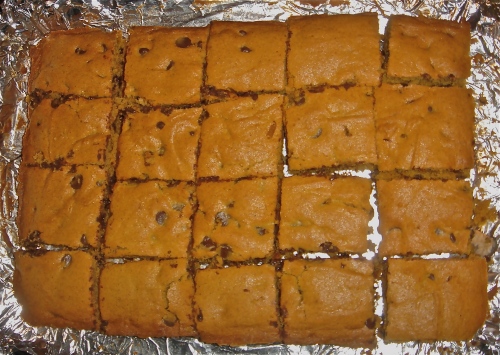
My friend Kaely passed this recipe along to me and I made them to take to work this past week. They were a hit and I had two co-workers ask for the recipe. They are very easy to make and taste delicious…you could probably do it in loaf pans too but I did them as bars.

Pumpkin Chocolate Chip Bars

  • 2 cups flour
  • 1 tsp baking soda
  • 3/4 tsp salt
  • 1 cup (2 sticks) unsalted butter – room temp
  • 1 and 1/4 cup sugar
  • 1 large egg
  • 2 tsp vanilla
  • 7.5 oz (half of can) pumpkin
  • 12 oz choc chips
  • cinnamon, ginger, allspice, nutmeg – to taste (I used approx 1 tsp each and a little extra cinnamon)

1. Preheat oven to 350 degress. Line bottom and sides of 9×13 pan with foil. In medium bowl, whisk together flour, spices, baking soda and salt; set aside.
2. With an electric mixer, cream butter and sugar on medium-high speed until smooth; beat in egg and vanilla until combined. Beat in pumpkin (may look curdled). Reduce speed to low and mix in dry ingredients until combined. Fold in chocolate chips.
3. Spread butter in pan. Bake until edges pull away from sides of pain – 35-40mins. Cool completely in pan.
4. Lift cake from pan – use serated (or plastic) knife to cut.

DSC07047

I also love the Pumpkin Pancake Mix from Trader Joe’s. I have made them the last two weekends in a row and am a big fan! They are simple to mix up – just add milk, butter and an egg…and this week I added chocolate chips to mine and they were even better! My sister said she put white chocolate chips in hers when she made them, but I didn’t have any and am not a big white chocolate fan anyway. If you haven’t tried them yet and have a Trader Joe’s nearby…go buy a box and enjoy some pumpkin pancakes along with your college football next weekend!

DSC07154

2 Comments

Filed under recipes

Chicken Tortilla Soup

Living in San Diego, we don’t really experience fall the same way most of the country does around this time of year. When my friends at home are taking out their pumpkin candles and starting to wear scarves, we are still going to the beach and wearing flip flops. Not that I am complaining…but the grass is always greener, right? So even though I am glad to be living in a city with amazing weather year round, there are times I miss the changing of the season and the things that come along with them – like certain fall foods. I love the smells of fall…all of the delicious baked goods that are in season, a big mug of hot chocolate or apple cider, or maybe just a bowl of soup or chili on a cold day. I have my fingers crossed that the weather here will get a little cooler soon so I can enjoy these things even if I have palms trees outside my window instead of changing fall leaves! 🙂

If you own a crock pot, this is one of the easiest recipes I have ever come across (thanks mom)! Last fall/winter each event I made it for was followed by people raving about how great it tasted and asking for the recipe. I even had a couple guy co-workers ask for the recipe and cook it too – which you know means it is easy! It is seriously SO simple – you cannot go wrong…and you will have a great dinner to serve with little to no effort. It works for just a couple of people (leftovers of course) or a big group.

Ingredients
  • 4 chicken breasts
  • 1 large jar/container salsa
  • 1 can chicken broth
  • 2 cans Great Northern beans
  • 2 small blocks (or one large) pepper jack cheese
Place whole chicken breasts in a crock pot and add the chicken broth, salsa and beans. Cook on high 4-6 hours (or I guess you could do it all day on medium). Add pepper jack cheese about thirty minutes before serving so that it has time to melt. Mix well (you may find that you have to shred the chicken a bit with a fork depending on how long it has cooked). The spiciness of the salsa would determine how spicy the soup is. I would use at least medium…but that is up to you. Feel free to experiment or add additional ingredients too! You can top each bowl with sour cream, sliced avocado or even jalapenos for some added kick! Serve with tortilla chips.

1 Comment

Filed under recipes

Make that an ice cream cake, please

So, at work I am more or less known as the “Betty Crocker” of the office, which is humorous to me because I don’t think it is necessarily true, but I guess things are just different in the south. My mom always made things from scratch so to me that’s just how you do it. I like taking the time and effort to make things a little better – whether it’s making homemade icing for cupcakes or using fresh ingredients for salad dressing or cutting up a little “garnish” to put the finishing touch on a dish – the extra work is worth it and honestly just makes it more fun.

So all this to say, we do a monthly birthday celebration at work and normally buy a cake from a local bakery. I thought what better excuse for me to volunteer to make the cakes instead? Because I would have fun doing it, and it would also add a homemade touch to the office birthday celebrations. So I asked the August birthday guests of honor what type of cake they wanted and got one vote for chocolate on chocolate and three votes for ICE CREAM CAKE! So I made both. The ice cream cake was nothing extravagant – but it was super easy and a big hit, so I thought I’d share!

Layered Ice Cream Cake (serves about 10)

  • one half gallon of ice cream
  • one box cake mix – any flavor
  • one cup heavy whipping cream
  • 3 Tbsp. powdered sugar
  • crushed oreos (or any candy) for topping

I made this in a bread pan because I didn’t want it to be huge (we were having two cakes) but you could change up the size to any size you want, which is kinda fun – just may need more ice cream for a bigger one! A full cake mix really makes too much cake for one bread size version but I just ate the extra cake, which was fine with me. 🙂

Bake a very thin layer of cake in two separate loaf pans (about one-two inches of batter?). Cool on a baking rack and cut the tops off if needed so that both are perfectly flat. Meanwhile, set the ice cream out for a bit to soften. Whip the whipping cream, adding in powedered sugar, until stiff peaks form.

Time to layer! You can do whatever you want here – I did chocolate cake and two flavors of ice cream…one mint chocolate chip and one cookies n’ cream. I put cake on the bottom, followed by one ice cream layer, then about half of the whipped cream mixture, then all three again – cake, second ice cream flavor and whipped cream on top. I covered the top in crushed oreos and drizzled chocolate syrup over it in a zig zag pattern – but you could really get creative – peanut butter ice cream with reeses topping…cookies and cream with oreo…mint chocolate chip with andes mints – the options are endless!

Sorry there is no picture this time (I knew Julie, my faithful blog reader, would ask!) but it got eaten so fast by my co-workers and I didn’t think to take one. What would be your birthday cake of choice? I need ideas for the coming months so let me know if you have any good ones!

1 Comment

Filed under recipes

Restaurant Week

For those of you here in San Diego, don’t forget this week is Restaurant Week! I am sad that I can’t partake – normally I would not pass it up, but I haven’t had a free night yet, and I am leaving San Diego tomorrow for my annual college roommate weekend (speaking of which, I am SOOOO excited – this is one of the highlights of my year!) But for those of you in town or with a spare $30 or $40 to drop on a delicious meal, there are some great menu options, so check them out!

2 Comments

Filed under General

Simple Creme Brulee

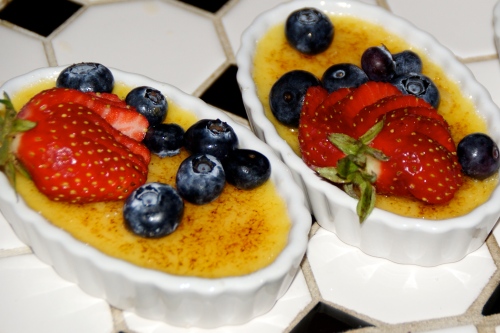
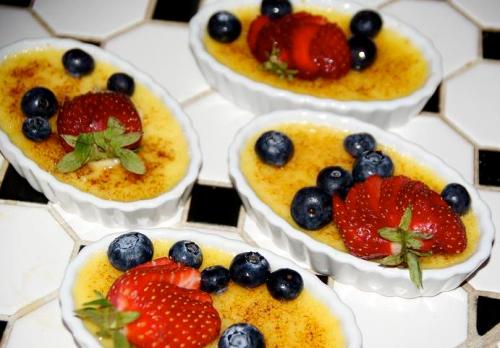
When it comes to my favorite desserts (and trust me, there are many)…creme brulee is definitely at the top of the list. For being so “plain” and simple, it is still one of my all-time favorites. I just love the crunch of the caramelized sugar on top as your spoon cuts through and into the perfectly smooth custard below. The creamy texture and vanilla flavor with the combination of fresh berries is perfect – wow I am craving it right now! Well, needless to say, I have always wanted to try making it but there were too many obstacles…it seemed complicated, no torch, etc. BUT, I recently overcame these barriers, bought a torch and made it for the first time. It was so easy! and just as good as I hoped.

_DSC7446_2

The recipe is simple (see below) – the most work is the water bath (not “work” just making sure you do it right) and the torching. We tried raw sugar, brown sugar and white sugar and decided that white sugar was the best bet. It got the hardest on top without being grainy or thick. The torch itself was $19.99 at Bed Bath and Beyond – it was the bottom of the line in terms of quality (I looked at Williams-Sonoma too and theirs were more, which I may invest in later) but for now the cheap one was fine…and came with four small dishes to bake the creme brulee in. We made enough for 12, and a few extras for a “sample” to test the different sugars on top the night before we actually served it. I think it was a bit much torching them for that many people all at one time, while we were still cooking dinner too, but it is definitely a great dessert to make in advance and can be (or even should be) refrigerated overnight.

Now that I have the basic version under my belt I’d love to try other variations too – let me know if you’ve ever had a special flavored one that was good!

cremebrulee

Creme Brulee (serves 4)
recipe from Joy of Cooking

  • 2 cups heavy cream
  • 8 egg yolks
  • 1/2 cup sugar
  • 3/4 tsp. vanilla

1. Heat cream almost to a simmer.

2. Stir egg yolks and sugar with a wooden spoon in a medium bowl just until blended

3. Gradually stir in the cream. Strain through a fine-mesh sieve into a bowl or large measure with a pouring tip. Stir in vanilla.

4. Pour into four 6-ounce or six 4-ounce custard cups or ramekins and place in a water bath (see below).

Set the pan in the oven and bake at 325 until the custards are set but still slightly quivery in the center when the cups are gently shaken, 30-35 minutes (NOTE: we only did about 25 minutes). Remove the cups from the water bath and let cool to room temperature. Cover each one tightly with plastic wrap and refrigerate for at least 8 hours or up to two days. Shortly before serving, cover each cup with a light layer of sugar and carmelize with a butane torch.  FYI, we tested white, brown and raw sugar and found white was the best – it got the hardest on top. I have read several differing opinions on this but that was just my experience this time around.

Water bath instructions:
Choose a pan that is big enough to comfortably fit all of the cups/ramekins without them touching each other or the pan sides. Place a dishtowel in the bottom of the pan and arrange the cups on top of the towel. Pour scalding hot tap water into the pan until it comes half/two thirds of the way up the custard dishes. It is easier if you place the pan partially in the oven on the rack and then pour the water so that it isn’t too heavy.

2 Comments

Filed under recipes

Summer Catch

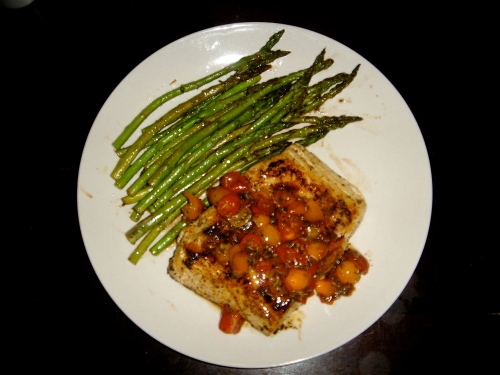
This past weekend at the farmers market I discovered that I have been passing over one of the best deals there! There is a booth that consists just of tables with coolers sitting on them…I’ve seen them before and even sampled their ceviche as I walked by, but I didn’t realize they were simply selling cuts of fresh fish. I looked down in the coolers this week to find beautiful fillets of salmon, ahi tuna, sea bass and more for just $5 a piece. I thought I would experiment with some new recipes so I got some sea bass and ahi for this week. I love seafood, and living in San Diego I try to eat it more since it is more readily available (and fresh) than anywhere else I’ve lived. I enjoy most types of fish, but my favorite seafood dish to date is the halibut at George’s on the Cove…and I just discovered the recipe they use online, so I’ll have to attempt re-creating that at home and post the recipe for it too!

DSC06972

Pan-Roasted Sea Bass with Citrus Heirloom Tomato Vinaigrette
adapted from a Coastal Living recipe online (serves 4)

  • 1-2  cups  seeded and chopped heirloom tomatoes
  • 1 1/2  tablespoons  sugar
  • 1/4  cup  red wine vinegar
  • 1/4 cup balsamic vinegar
  • 1  tablespoon  chopped fresh Italian parsley
  • 1  teaspoon  chopped fresh thyme
  • 1  tablespoon  fresh lemon juice
  • 1 clove of garlic (minced) or garlic powder to taste
  • 1  teaspoon  sea salt
  • 1/2  teaspoon  freshly ground black pepper
  • 1/2  cup  extra-virgin olive oil
  • 4  (6-ounce) sea bass fillets, with skin
  • Salt
  • Freshly ground black pepper
  • 1  teaspoon  olive oil

1. Combine tomatoes, sugar, and vinegar in a saucepan over medium heat; cook 3 minutes or until sugar dissolves. Stir in parsley and herbs, lemon juice, olive oil, salt and pepper. Set aside.

2. Sprinkle fish fillets with salt and pepper. Sear fillets (skin-side down) in 1 teaspoon oil in a cast iron skillet over medium-high heat about 2 minutes. Press fillets flat with a metal spatula to prevent curling. Turn them over and then transfer skillet to oven, and bake at 450° for 5 minutes or until fish flakes with a fork.

3. Serve fillets with the tomato mixture spooned over the top with a salad or fresh vegetables.

2 Comments

Filed under recipes

Blog Hopping

This is totally unrelated to food, but I just got off the phone with my sister and we were laughing at all the “blog hopping” (as she called it) that is so prevalent now. In conversation she had asked me about some books I read, which come to find out she knew about from reading the comment section of Julie’s blog (I don’t think my sister has ever met Julie) then asked me about a movie reviewed on my friend Kathyn’s blog (they have met, but still…somewhat random). Then, the kicker was my friend Anne who just told me this hilarious story about her friend who bumped into this couple and could not figure out for the life of her how she didn’t know them or their names, but yet knew all of this random info ABOUT them, like the fact that their dog just died…only to later realize that she’s never met them, she just reads their blog!! (friends of friends, I suppose) I just think it is really funny how viral blog links can be, and before you know it you are looking through before and afters of some random person’s house renovation, or baby pictures from someone you recognize from college but haven’t seen in five years. Oh, the internet…it’s a crazy thing!

Thinking about ‘blog hopping’ and whether or not that was an official term these days that I just wasn’t aware of, I went to the source of all slang…Urban Dictionary. There were actually a freakish amount of blog terms listed there but I guess people not only sit around stalking blogs, but also creating blogger terminology and adding to Urban Dictionary. Anyway, here are some that I thought were funny…

blogaholic: someone whose life subsists for their online blog and their “fan club, ” namely other blogaholics

blog envy: the jealousy you feel when you realize that your friend’s blog is more popular than yours.

blog fodder: an interesting idea, story, or link. Referred to as blog fodder when your first reaction is to use it in your blog.

blog vomit: The process of writing about someone or something in your blog that contains discreet information that you will regret writing later.

blogslap: to virtually insult someone through a blog.

There are tons more, but I’ll leave you with those for now. Happy blogging!

2 Comments

Filed under General

Julie & Julia

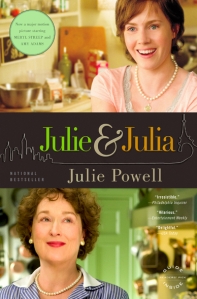
coverSo I am in a book club, and we have been talking about doing a book-turned-movie so that we could go see it together after all reading the book. We settled on this one because of a few recommendations and the fact that the movie looked like it would be cute. A lot of times books are better than the movie, and sometimes the movie just ruins it altogether, in my opinion. Well, this one was the other way around for me. I didn’t love (or even really like) this book, so the movie was actually a step up from the book in my opinion.

The book is the story of Julie Powell, who decides to cook (and blog) her way through Julia Child’s Mastering the Art of French Cooking in one year. The stories of her adventures buying, cooking and eating some of these elaborate French dishes (extracting bone marrow, de-boning a duck…) are pretty funny, but I found myself getting bored with the repetition by the middle of the book. Also, there is a lot of time spent on unrelated storylines, usually told from a rather negative perspective. I just didn’t find Julie to be a very likable person. HOWEVER, the movie focused a lot more on the life and personality of Julia Child, which I found extremely entertaining and enjoyed much more than the rantings of Julie Powell. I loved Meryl Streep and her impressive rendition of Julia Child’s persona and even voice. I thought she was hilarious and she had me laughing from beginning to end. I also enjoyed the Paris/France scenes that were included during her segments.

julie

I would recommend the movie for sure…but if you ask me, skip the book and read something better. Oh, and if you’re like me, you might leave the theater craving a huge meal, soaked in butter of course.

4 Comments

Filed under book reviews

Supper Menu Line

I have a new favorite blog! Mac and Julie Wheatley have started a new one and already I am loving it! It is full of funny and interesting commentary – I already look forward to seeing my google reader pop up with a new post from Our Life is Wheatley and seeing what is in store. Also, Julie is a great blog commenter and makes me feel like at least one person out there is reading my occasional posts…ha!

This post really cracked me up – and I thought since it is food related I would re-post it for some Friday entertainment! It is the “supper menu line” for a hospital in Shreveport, Lousiana. You can check out the original post on their blog for an explanation of how it was discovered and what exactly it is…but it is sure to provide some entertainment for you! I called this morning more than once – I can’t wait to check out the menus in the future…I am saving this number!!

Try it for yourself. It is just a recording, but you have to hear it! 318-681-4564

3 Comments

Filed under General